
Step-by-Step Home Construction Guide - Part IV
Posted by Ward Cedar Log Homes in Log Homes Log Home Construction Guide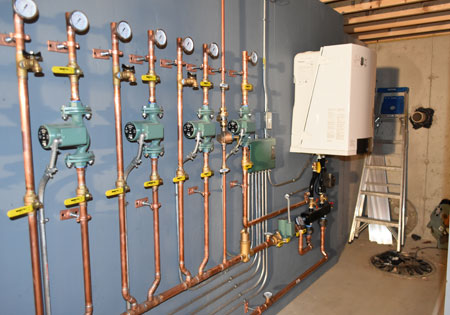
From Dream to Done: A Step-by-Step Guide to Building
Part 4: The Rough-In
With your home’s framing finished, your build is really beginning to take shape. Once upon a time, back in those log-cabin-in-the-woods days, your home would be complete. But there are still some essential steps that are needed to bring your home firmly into the world of modern comforts — namely, the installation of your home’s mechanical systems.
This important phase of construction is referred to as the rough-in stage and involves three key systems: HVAC, plumbing, and electrical. Here are some key points to keep in mind through this stage of construction:
1. Think It Through
Before you ever have your subcontractors set foot on your site, you will need to have a clear plan about where you want certain elements of your systems. While some decisions will be made solely based on code, for others, you’ll still have plenty of say.
For example, you’ll work with your general contractor and subcontractor to come up with a wiring layout that specifies the placement of your light fixtures, outlets, and switches and any other electrical needs, such as internet hot spots or sound system speakers. (This is especially important in a log home where the exterior logs will have to be predrilled and notched during the wall assembly process.)
Keep the efficiency of your HVAC system in mind during this stage (proper sizing will heavily impact efficiency) and think through where you’ll place your HVAC elements, such as air vents and return grills.
The same goes for your plumbing plan. Centralizing your plumbing needs — bathrooms stacked one atop the other or placed back-to-back — will also boost efficiency. Additionally, be sure to know where you need hot- and cold-water pipes, along with any gas lines for appliances in the kitchen or laundry room. If you will be using a gas unit in your fireplace, the lines and insert will be installed during this phase.
2. Give It (a) Room:
A well-placed and well-designed mechanical room will allow your trades to do their jobs with ease, rather than vying for the necessary wall space to install your mechanical equipment. Ample space for your forced-air heating (and possibly cooling), water heater, and electrical panel are a must. If you are planning for radiant, in-floor heat, a well pump pressure tank, or any special tech additions (such as security systems), you’ll want to include these here, as well. Mechanical rooms are often placed in a basement, although a dedicated room off a garage is a popular option, as well.
3. Order of Operations
Though there may be exceptions, generally speaking, the HVAC, plumbing, and electrical components will be installed in this order due to the practicalities of space/size. Your HVAC ductwork will take up the most room, followed by the piping and wiring, so it is more sensible for the electrician to navigate wiring around ductwork rather than the HVAC tech trying to maneuver large ducting around pipes and wires. You’ll want to keep this in mind as you line up your trades.
4. Schedule Smart
Be thoughtful about scheduling your subcontractors during the rough-in phase, if you do not have a general contractor handling this for you. It is best to allow each trade to have free reign of the site during their part of the installation. Practically, this staggered coordination will ensure a smooth operational flow, giving your tradespeople the space they need to do their best work and avoid any overlap (and, by extension, time delays) that may come from having two trades working in the house concurrently.
5. Take It Outside
While the rough-in stage is usually centered on the interiors of the house, don’t forget to consider what you may need to include outside of your four walls. Some homeowners may want to install outdoor security cameras around the house or even the perimeter of their property. Or, if you’re building in a climate that receives regular snow and ice, you may want to install in-floor heating in your garage or on the walkways around your home or driveway for added safety and reduced winter maintenance. Be sure to think through your entertaining habits (or hopes) and include any special outdoor lighting or sound system needs into your plan, as well.
Next up: Stay tuned as we cover how to “finish” out your home — literally. All things interior finishes are the talk of Part 5 of our Step-by-Step Guide.
Contact us today to begin your log home journey.
Be sure to follow us on Facebook, Pinterest, and Instagram for inspiration, events, tips and more!
Post Your Comment